DIY Gallery Wall Tutorial

So, I feel like I’m saying this ALL. THE. TIME. lately, but it’s been a crazy busy week so far here in the Mercer house!

Our handsome little man turned two this weekend and, though we didn’t plan much in terms of a party, we enjoyed a ton of family time celebrating.
Carson's Birthday

With our busy weekend, I didn’t really get started working on the gallery wall until Monday. I’m SO, SO sorry for the delay, but hopefully you’ll find that it was worth the wait!!!


The gallery wall, as it’s come to be known, is definitely a fast growing trend in home decor and for good reason, they really are a versatile way to fill a large wall space with a ton of creativity and personality!

Since moving into our house last fall, this super awkward wall in our living room has had me stumped.

Gallery Wall @ making it in the mountains

With it’s weird jump out and then back in, I’ve had no clue how to decorate it.  Enter the GALLERY WALL – I’m pretty sure if it weren’t for pinterest, this wall would remain empty and void of any personality forever!

Desperate to get some pictures up on my wall, I decided to create my own little gallery wall from the pile of frames we still had boxed up in our basement.  Fortunately Unfortunately, I don’t have a stellar picture, but this one of Brady reading a bedtime story to Carson will give you a good idea of what an epic fail it was!

How NOT to do a Gallery Wall

Turns out gallery walls aren’t as random as they may appear and there are better ways to hammer the picture hook in the right spot than trial and error … who knew?!

This time around I decided to take my time and do it right!  I chose some bigger frames to really help fill up the space (clearly that was an issue with my first try).  I played around with different layouts for weeks, leaving things set up on our guest bed and shifting pieces around every time I walked by.
Different Gallery Wall Layouts @ making it in the mountains

Originally, I was drawn to the layouts that lined up to make a perfect square – I liked how put together they looked and my facebook fans agreed when I polled them on their favorites.  Then I started looking through zillions of gallery walls on pinterest (why didn’t I think to do this at the beginning?!) and I realized that a less perfect look would not only allow me to add to it easily down the road, but it turns out I really liked that sort of haphazard, yet still collected look (you can see my favorite layouts here).  Plus, I came across these and just had to add them into the mix!

Sneek Peek Gallery Wall | making it in the mountains

So, after playing around with different layouts on the bed yet again, I finally decided on the one I thought looked best.

Just to be sure that everything would fit just right, I measured the width of the three sections of wall (divided up by that weird jut out), taped some kraft paper together to replicate that width, and laid it all out on the living room floor.  *You could totally skip this step as you’ll get another chance to move things around later before actually nailing into the wall, but with my weird wall(s), this step was extra useful.

gallery wall @ making it in the mountains

I ended up having to flip a few things around as I realized that some of the frames were going to hang over the edge of the wall.  Here’s where I finally landed.

gallery wall @ making it in the mountains

*Note: you’ll notice that the paper on the left has no frames on it – because it’s right next to the window, I’ve decided to leave that little section of wall empty until after we hang some curtains.

Next up, I traced all of my frames onto the paper and cut them out had Brady cut them out while he was relaxing on the couch watching golf (he offered!).  I marked the nail spots from the frames onto the paper cutouts and B (clearly this wasn’t a job for little 4’11 3/4″ old me) taped them onto the wall with painters tape to recreate what I had going on the floor.  *Tip: it definitely helped to have pictures of the planned layout to look back on to make sure we got everything in just the right spot.

gallery wall @ making it in the mountains

Letting it sit for the day on Tuesday gave me a chance to make sure the layout was just right and using painters tape allowed me to adjust things as needed.  Once I was absolutely sure everything was just where it should be (where was this careful thought the first time when I needed it?), all I had to do was hammer a hook into the holes I marked on the kraft paper, rip it all off and hang up our pictures.

Gallery Wall Tutorial @ making it in the mountains

I wish I could take credit for this brilliant idea, but in my search for inspiration (and my subsequent online frame shopping), I actually came across this handy video tutorial that the folks at Pottery Barn put together.  As I was doing this, I wondered many times if it would be as easy and seamless as it appeared to be in the video and, let me tell you, nobody was more surprised to learn that it absolutely was (well, maybe Brady)!

And …..

Here it is!!!

DIY Gallery Wall @ making it in the mountains

DIY Gallery Wall @ making it in the mountains

DIY Gallery Wall @ making it in the mountains

DIY Gallery Wall @ making it in the mountains

DIY Gallery Wall @ making it in the mountains

DIY Gallery Wall @ making it in the mountains

DIY Gallery Wall @ making it in the mountains

DIY Gallery Wall @ making it in the mountains

DIY Gallery Wall @ making it in the mountains

DIY Gallery Wall @ making it in the mountains

Need some inspiration for your Gallery Wall?  Here‘s a great place to start!

Already have a gallery wall in your home?  Did you plan it out or wing it?

DIY Gallery Wall Tutorial @ making it in the mountains


Sources:

Mirrored frame: Target (I couldn’t find it online)
Small silver frames: Target (here)
Wood frames: Target (here)
Cream ceramic frame: Target (couldn’t find this one online either)

The antlers, ampersand and M were purchased from The Shabby Shak on Etsy.   I won’t link to this shop simply because I don’t want people to mistakenly click on it thinking I am encouraging you to shop here.  Though I was happy with the antlers and ampersand, the letter M was sent in the wrong colour.  The owner, Angela, sent a bright white when I had actually ordered a creamy white and, because I had requested “creamy white” (as I saw here) rather than just “cream” as listed in her colour choices on this particular listing, she decided that she would only fix it for me if I paid to ship it back.  Feeling like I’d already paid a ton for shipping, I decided to suck it up and use it anyway.  I’d be lying if I didn’t say I was disappointed in not only receiving what I felt like was the wrong colour, but even more in her correspondence and the way she handled things – making me feel as though she was so busy that my order didn’t even matter to her.  I wanted to be honest about my experience with this shop and suggest that you seek out one of the many other fabulous shops that make similar wall decor.  I also want to point out that I have had many, many purchases on Etsy and this is the first and hopefully the only time I have been disappointed with my shopping experience – if you haven’t tried Etsy yet, please, please don’t let my crummy experience scare you away from scoring some amazing things that you would never find anywhere else!

Wishing you a lovely week!!!

Signature1


Shared with: From My Front Porch to Yours, The Style Sisters, Sew Crafty Cat, A Stroll Through Life, Green Willow Pond & Mostly Homemade Mom.


Shopping for an Outdoor Dining Set

Shopping for an Outdoor Dining Set
With the sun shining and the temperatures creeping up, Spring finally seems to be rolling in! Summer won’t be far behind and let me tell you, there is nothing as beautiful and lovely as summer in the Kootenays! Already, I find myself dreaming about breakfasts outside in the warm summer sun, taking in the amazing mountain views. At the moment our yard is a big, messy pile of snow & mud and, with a million other things to spend our money on this summer, the best we can hope for is a big, messy pile of dirt … so, when we’re not out hiking or biking, we will likely be enjoying the great outdoors on our courtyard deck. Without a place to sit or even set down a drink, it’s not an easy place to relax. Enter the outdoor dining set.

Originally, I figured we’d shell out $500 for a decent dining set up and enjoy it for years to come; however, it seems (like so many other things), I greatly underestimated what it would cost to get even a simple table and some chairs. I could go to ikea or Walmart and find a smaller, less expensive set to get us through the summer for $300-$500 and it would do the job, but I just can’t bring myself to spend so much on something that will be so temporary. So instead, I’ve adjusted our budget to $1000 (*ish).  I’m picturing something with a wood or wicker look, but we need something that will stand up to the elements on our uncovered deck and I’m not really open to doing a ton of maintenance every year, so I’m thinking faux wood and resin wicker will work best for us.

I thought I’d share some of my favorite options. If you’re hunting down an outdoor dining set this Spring too, hopefully this will help get you started!

Seating for 4:

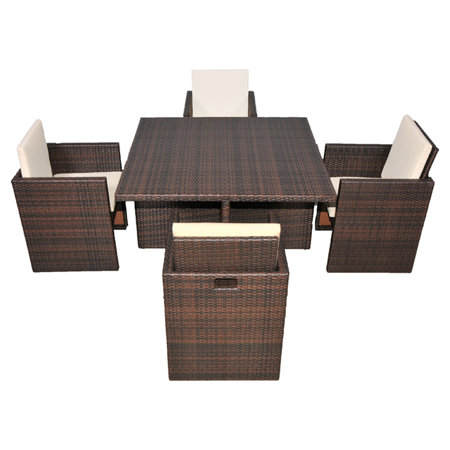
Joss and Main has this 5 piece dining set for $1090 right now, which really seems like a steal when comparing it to similar sets!  I absolutely love the idea of being able to tuck everything away from the elements so easily!

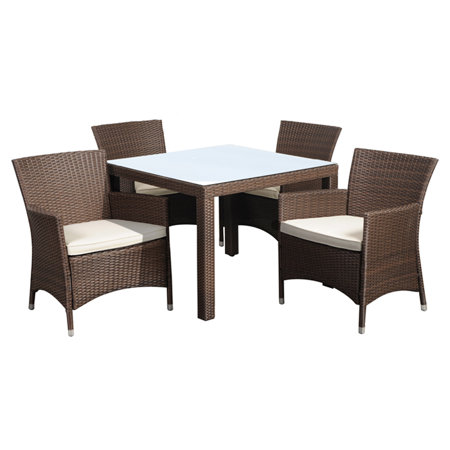
Another 4 seater option from Joss and Main for only $790.  I like the substantial chairs and the table has got a classic look, but unfortunately, it’s a bit small for us.

Seating for more:

Home Depot has this 7 piece set for only $855.  That’s a faux wood table (so no maintenance) and the chair cushions and lumbar pillows are included in this price.

campagnia-monza_1

This option came from an unexpected place … Jysk.  At $699, this set seems like an amazing deal!  The black wicker looks a bit more contemporary and I’m loving the shape of the chairs.

If you have a bit more to spend:

At $1338.00, This is definitely over budget, but I really do love the idea of being able to tuck away the chairs easily, which will really help to keep them clean and dry.  Unfortunately, no cushions for these ones.

This faux wood table and the resin wicker chairs are exactly what I’m looking for!  It comes in a bit over our budget at $1599 from Hayneedle.

Coming in at $1836, this set up isn’t really an option for us, but I couldn’t help but share the brilliant way everything folds and tucks under the table!

Though I’m not so sure about the wood construction, I do love the classic look of this set.   I also really like that I could purchase a couple of wicker chairs for each end down the road to expand this set for 6 people.  This set is slightly over our budget at $1270, but isn’t completely unreasonable to consider.

A girl can dream:

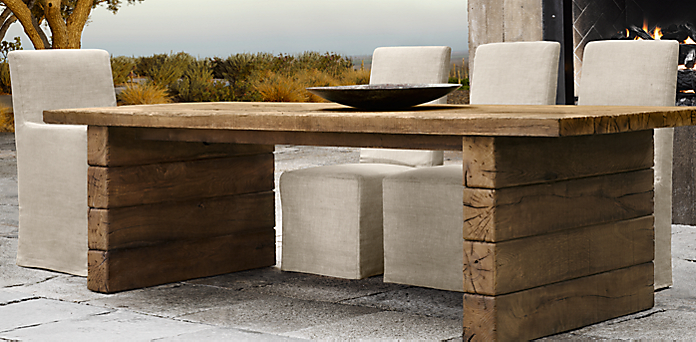
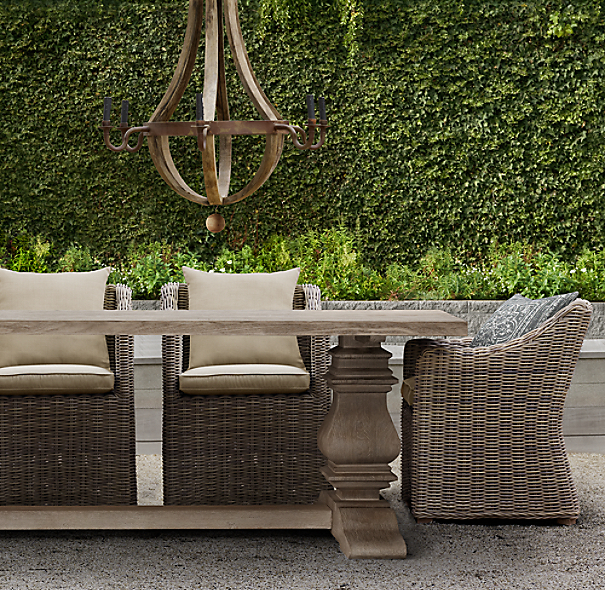
If you have thousands to spend, and a covered space to protect your investment, then these options from Pottery Barn and Restoration Hardware should absolutely top your list!  SO gorgeous!!!

DIY option:

I truly love the idea of building our own set!  This way we could really get the look we’re going for and, not only would we save some money, but we would appreciate them so much more.  I’m not afraid to put the work in (not sure hubby agrees with me here), but I don’t love the fact that we would have to put work into maintaining the beauty for years to come.


With a bit of digging, I was able to find a ton of choices that would work for us.  I really like the idea of building our own set … with all of the building plan options available online, there’s no doubt we could find something resembling one of the dream tables from Restoration Hardware or Pottery Barn.  With a couple of benches and a a pretty wicker chair at each end, I think it could look really great!

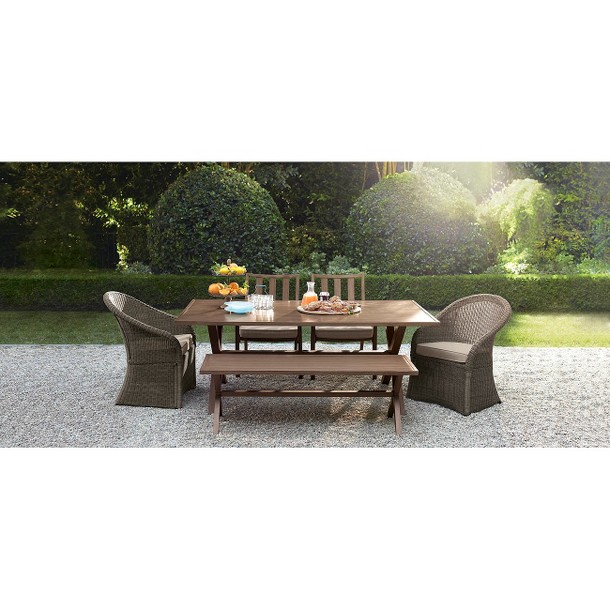
If we do decide to buy, this is perhaps my favorite option … at $906 it comes in under budget and I really love the mix of the metal and wicker.   With the rustic looking table and bench, the metal chairs and the wicker, this set is exactly what I was picturing!  Added bonus: with a throw cushion or two, those wicker chairs would be a comfy place to curl up on the deck with a book!

Would LOVE to hear what you think would look best on our little courtyard deck?

House | making it in the mountains

Signature1

Friday Finds

We’ve had such a lovely week in sunny Rossland!  I’ve FINALLY been able to run outside, which is infinitely less boring than running on the treadmill.  I’d forgotten how much I enjoy the challenge, fresh air & time to myself … it’s SO nice to find myself looking forward to my runs again!  Carson has a new pair of rain boots and so, we have been putting them to the test every chance we get.  Though we are absolutely loving this amazing taste of Spring, Carson is definitely hoping for some rain so he has an excuse to play with his new umbrella (he’s woken up asking for it every day since he got it!).  This weekend I’m really hoping to conquer those shelves I’ve been talking about for far too long – hopefully I’ll have another finished project to share next week.  In the mean time, here are my favorite finds from this week:


Favorite Dining Room


Favorite Office Makeover


Favorite Target Find


Favorite Boots for Spring


Favorite Light Fixture (wouldn’t this look amazing in our front entry?!)


Favorite Way to Blog


Favorite Must-try Breakfast


Wishing you a lovely weekend!

Signature1