I came across this post by Liz Marie Blog on Pinterest a few weeks ago and it looked so do-able I figured it would make a great first DIY for us!
And so, I sent Brady to the hardware store that day to pick up the lumber. We bought 2 – 1x6s and hubby cut them to 8′ lengths for me. I picked up a small can of Minwax wood stain in Dark Walnut and, after sanding down the raw edges on each end, I got to work. After letting the first coat dry on one side, I noticed that there was A LOT of unevenness to the colour that I wasn’t exactly thrilled with.
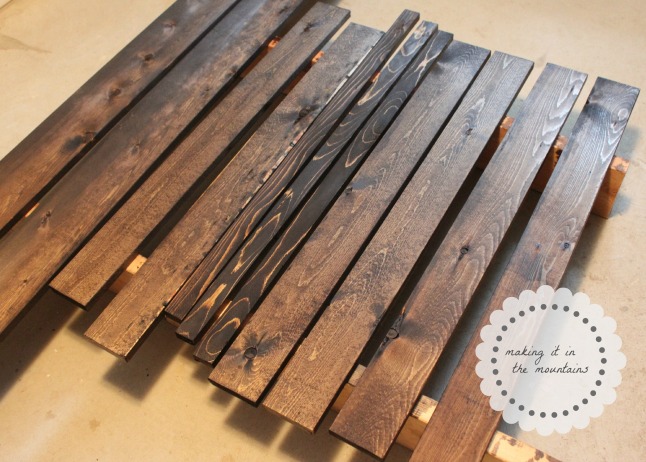 *NOTE: There are some extra boards pictured here that I stained for another project that I’m working on*

I had read about using a pre-stain in my research for yet another project I’m planning, but thought that it would be overkill on such a small project as this. Upon seeing this first coat, I changed my mind. So, I dug out my can of Minwax Pre-Stain Wood Conditioner and painted it on the other side. With my first coat of stain, I could already see a big difference between the two sides … LESSON LEARNED! And with that, it was decided that this side would definitely be the front of my project. 😉

After another coat on each side, I let the boards dry for a couple of days (I gave them some extra time as they were sitting outside in our unheated garage). I screwed some eye bolts into the front – one centered on either end and one in the middle – and tied a string of twine through each one. I then hammered some art hangers onto each end of the back to hang it with.

All that was left to do was put them up on our “office” wall and hang some art to display.

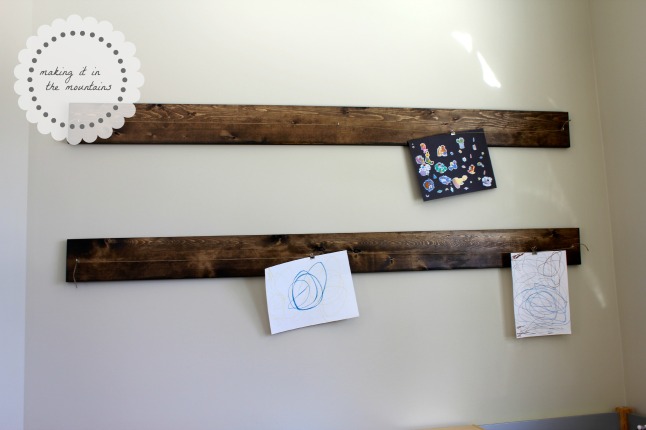
I’m just SO thrilled with how they turned out! What a fabulous way to display Carson’s artwork!


Featured on


Like this post? Then, don’t miss a beat! Like my  to follow along with my journey!
Shared with: Kleinworth & Co, Craving Some Creativity, Saving 4 Six, No Biggie, DIY Showoff, Pieced Pastimes, Delineate Your Dwelling, It’s Overflowing, The Blissfull Bee, Too Much Time on my Hands, Miss Mustard Seed, The Thrifty Groove, Liz Marie Blog, Imparting Grace, From My Front Porch to Yours, Green Willow Pond, A Stroll Through Life, Jennifer Rizzo, Craftberry Bush, Romantic Home, French Country Cottage, Nifty Thrifty Things, Common Ground, Twigg Studio, Flamingo Toes, Chic on a Shoestring, Soho Sonnet and Dimples & Tangles.


This is really nice Kristi! What a great idea! I’m so impressed at your handiwork and I’m sure you’ll get years of use from this 🙂
LikeLike
Thanks! It actually turned out really well and it’s great to have a place to display C’s art!
LikeLike
This looks great! Love it!
We would love for you to come link up Mondays 8:00am EST at Your Designs This Time.
http://www.elizabethjoandesigns.com.
LikeLike
Thank you! I would love to join in the fun!
LikeLike
Thanks for linking up, Kristi! Can’t wait to see what you share next Monday!
LikeLike
What a fun idea for your little Carson’s artwork! I’d love how easy it is to switch it out, too! Thanks so much for sharing it at Best of the Nest, Kristi!
LikeLike
Thank you SO much Pam!!! That’s definitely the best feature … he’s on a mission to keep them full it seems 😉
LikeLike
I can so totally see Christmas cards hanging from this! Looks really great. thanks for sharing. Visiting via “Our Sunday Best Showcase” linkup
LikeLike
Thank you! That would be a fabulous way to display them!!!
LikeLike
Great idea, this turned out awesome. I would love if you shared at Link It Or Lump It. I will also be using this in a blank wall decor round up next week… http://www.sohosonnet.com/link-it-or-lump-it/link-it-or-lump-it-link-party-32/
LikeLike
Thank you SO much for invite!!!
LikeLike
I love this idea!!! And I happen to have some scrap wood in the garage! Thanks for sharing!
LikeLike
Perfect! It’s a super quick and easy project to tackle 🙂
LikeLike
I love this. So simple and sweet, yet such a great idea!! Thank you for sharing at Redouxinteriors! Sharing at my party, starts tomorrow at 1:00 PST.
LikeLike
Thank you so much!!!
LikeLike