DIY Gallery Wall Tutorial

So, I feel like I’m saying this ALL. THE. TIME. lately, but it’s been a crazy busy week so far here in the Mercer house!

Our handsome little man turned two this weekend and, though we didn’t plan much in terms of a party, we enjoyed a ton of family time celebrating.
Carson's Birthday

With our busy weekend, I didn’t really get started working on the gallery wall until Monday. I’m SO, SO sorry for the delay, but hopefully you’ll find that it was worth the wait!!!


The gallery wall, as it’s come to be known, is definitely a fast growing trend in home decor and for good reason, they really are a versatile way to fill a large wall space with a ton of creativity and personality!

Since moving into our house last fall, this super awkward wall in our living room has had me stumped.

Gallery Wall @ making it in the mountains

With it’s weird jump out and then back in, I’ve had no clue how to decorate it.  Enter the GALLERY WALL – I’m pretty sure if it weren’t for pinterest, this wall would remain empty and void of any personality forever!

Desperate to get some pictures up on my wall, I decided to create my own little gallery wall from the pile of frames we still had boxed up in our basement.  Fortunately Unfortunately, I don’t have a stellar picture, but this one of Brady reading a bedtime story to Carson will give you a good idea of what an epic fail it was!

How NOT to do a Gallery Wall

Turns out gallery walls aren’t as random as they may appear and there are better ways to hammer the picture hook in the right spot than trial and error … who knew?!

This time around I decided to take my time and do it right!  I chose some bigger frames to really help fill up the space (clearly that was an issue with my first try).  I played around with different layouts for weeks, leaving things set up on our guest bed and shifting pieces around every time I walked by.
Different Gallery Wall Layouts @ making it in the mountains

Originally, I was drawn to the layouts that lined up to make a perfect square – I liked how put together they looked and my facebook fans agreed when I polled them on their favorites.  Then I started looking through zillions of gallery walls on pinterest (why didn’t I think to do this at the beginning?!) and I realized that a less perfect look would not only allow me to add to it easily down the road, but it turns out I really liked that sort of haphazard, yet still collected look (you can see my favorite layouts here).  Plus, I came across these and just had to add them into the mix!

Sneek Peek Gallery Wall | making it in the mountains

So, after playing around with different layouts on the bed yet again, I finally decided on the one I thought looked best.

Just to be sure that everything would fit just right, I measured the width of the three sections of wall (divided up by that weird jut out), taped some kraft paper together to replicate that width, and laid it all out on the living room floor.  *You could totally skip this step as you’ll get another chance to move things around later before actually nailing into the wall, but with my weird wall(s), this step was extra useful.

gallery wall @ making it in the mountains

I ended up having to flip a few things around as I realized that some of the frames were going to hang over the edge of the wall.  Here’s where I finally landed.

gallery wall @ making it in the mountains

*Note: you’ll notice that the paper on the left has no frames on it – because it’s right next to the window, I’ve decided to leave that little section of wall empty until after we hang some curtains.

Next up, I traced all of my frames onto the paper and cut them out had Brady cut them out while he was relaxing on the couch watching golf (he offered!).  I marked the nail spots from the frames onto the paper cutouts and B (clearly this wasn’t a job for little 4’11 3/4″ old me) taped them onto the wall with painters tape to recreate what I had going on the floor.  *Tip: it definitely helped to have pictures of the planned layout to look back on to make sure we got everything in just the right spot.

gallery wall @ making it in the mountains

Letting it sit for the day on Tuesday gave me a chance to make sure the layout was just right and using painters tape allowed me to adjust things as needed.  Once I was absolutely sure everything was just where it should be (where was this careful thought the first time when I needed it?), all I had to do was hammer a hook into the holes I marked on the kraft paper, rip it all off and hang up our pictures.

Gallery Wall Tutorial @ making it in the mountains

I wish I could take credit for this brilliant idea, but in my search for inspiration (and my subsequent online frame shopping), I actually came across this handy video tutorial that the folks at Pottery Barn put together.  As I was doing this, I wondered many times if it would be as easy and seamless as it appeared to be in the video and, let me tell you, nobody was more surprised to learn that it absolutely was (well, maybe Brady)!

And …..

Here it is!!!

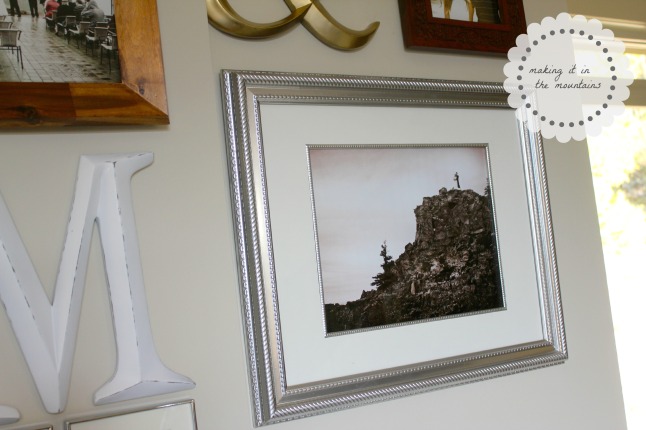
DIY Gallery Wall @ making it in the mountains

DIY Gallery Wall @ making it in the mountains

DIY Gallery Wall @ making it in the mountains

DIY Gallery Wall @ making it in the mountains

DIY Gallery Wall @ making it in the mountains

DIY Gallery Wall @ making it in the mountains

DIY Gallery Wall @ making it in the mountains

DIY Gallery Wall @ making it in the mountains

DIY Gallery Wall @ making it in the mountains

DIY Gallery Wall @ making it in the mountains

Need some inspiration for your Gallery Wall?  Here‘s a great place to start!

Already have a gallery wall in your home?  Did you plan it out or wing it?

DIY Gallery Wall Tutorial @ making it in the mountains


Sources:

Mirrored frame: Target (I couldn’t find it online)
Small silver frames: Target (here)
Wood frames: Target (here)
Cream ceramic frame: Target (couldn’t find this one online either)

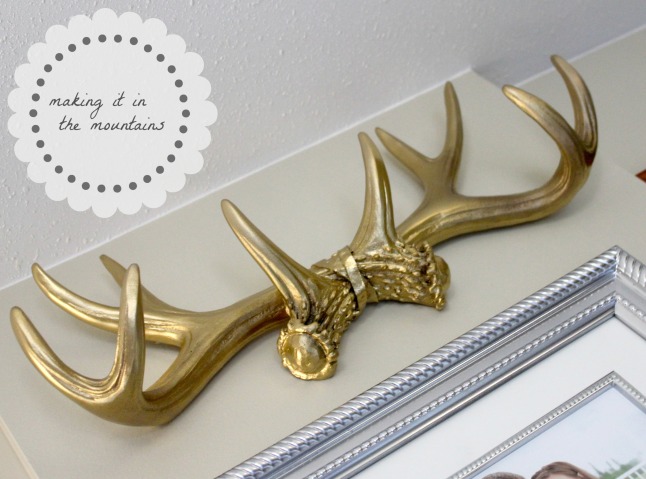
The antlers, ampersand and M were purchased from The Shabby Shak on Etsy.   I won’t link to this shop simply because I don’t want people to mistakenly click on it thinking I am encouraging you to shop here.  Though I was happy with the antlers and ampersand, the letter M was sent in the wrong colour.  The owner, Angela, sent a bright white when I had actually ordered a creamy white and, because I had requested “creamy white” (as I saw here) rather than just “cream” as listed in her colour choices on this particular listing, she decided that she would only fix it for me if I paid to ship it back.  Feeling like I’d already paid a ton for shipping, I decided to suck it up and use it anyway.  I’d be lying if I didn’t say I was disappointed in not only receiving what I felt like was the wrong colour, but even more in her correspondence and the way she handled things – making me feel as though she was so busy that my order didn’t even matter to her.  I wanted to be honest about my experience with this shop and suggest that you seek out one of the many other fabulous shops that make similar wall decor.  I also want to point out that I have had many, many purchases on Etsy and this is the first and hopefully the only time I have been disappointed with my shopping experience – if you haven’t tried Etsy yet, please, please don’t let my crummy experience scare you away from scoring some amazing things that you would never find anywhere else!

Wishing you a lovely week!!!

Signature1


Shared with: From My Front Porch to Yours, The Style Sisters, Sew Crafty Cat, A Stroll Through Life, Green Willow Pond & Mostly Homemade Mom.


Friday Finds: Here’s what I’ve fallen head over heels for this week

Happy Friday!!!

What a week it’s been with far too much to do and so little time to get it all done … thank goodness the weekend is almost here!  We have SO much to look forward to this weekend with our precious little man turning two on Saturday (I can’t believe it) and who could forget all of those lovely little treasures I purchased for our gallery wall that I just can’t wait to put up?!

Hoping you enjoy this week’s finds as much as I have!


Favorite Cake Recipe for Spring


Favorite Ikea Hack


Favorite Pallet Wood Project


Favorite DIY Entryway


Favorite Foyer Makeover


Favorite Rustic DIY


Favorite Freebie for the Laundry Room


Favorite Linen Closet


Favorite DIY Bowls


Favorite DIY Remake


Favorite Wall for a Boy’s Room


Favorite Front Porch for Spring


Favorite DIY Bench


Favorite Kitchen Remodel


Wishing you a lovely weekend!

Signature1

More Adventures with Chalk Paint: Dresser Makeover

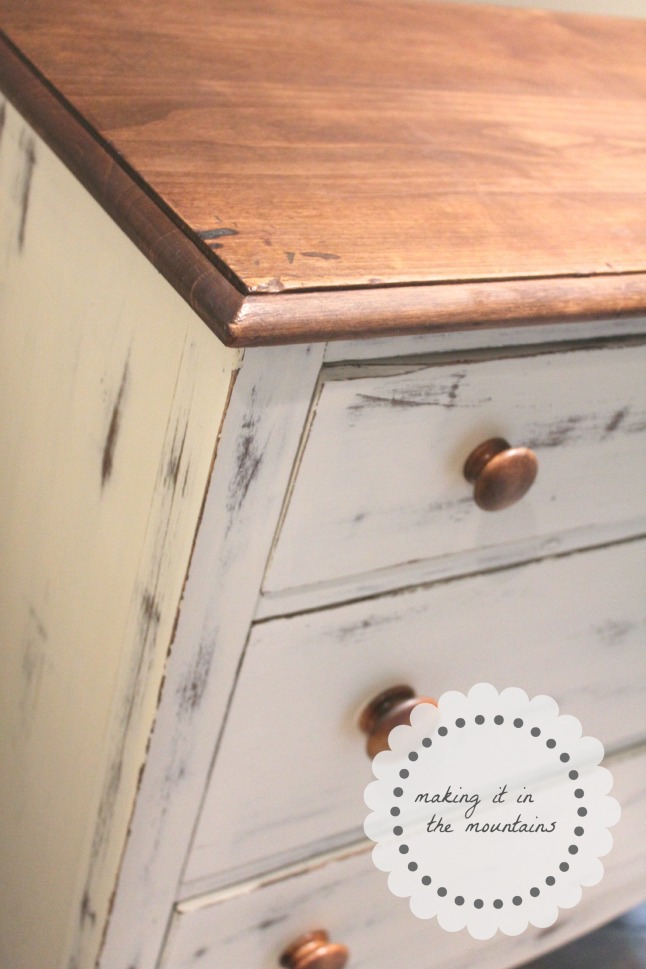
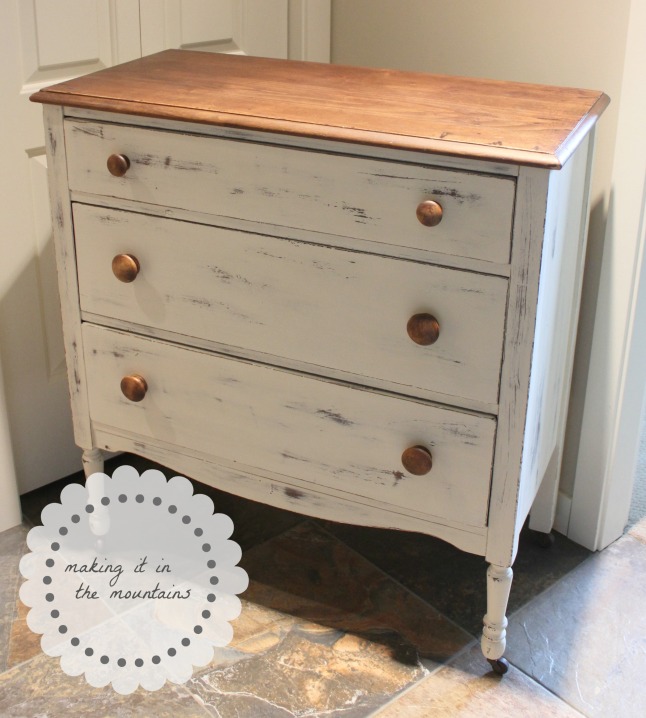
It’s been on my to-do list for more than two years now and it feels so great to say that I’ve FINALLY painted our little antique dresser!!!

Dresser Makeover @ making it in the mountains

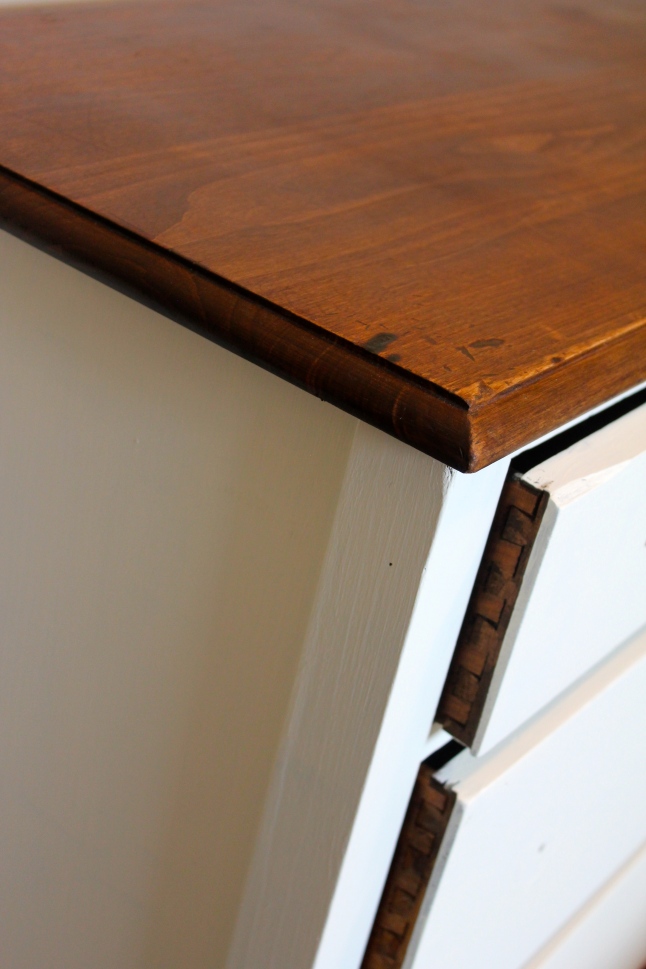
I introduced you to this beauty a few weeks ago when I wrote about my maiden voyage with Annie Sloan Chalk Paint HERE.  I fell in love with it when we were shopping for Baby Mercer’s nursery (*note that Baby Mercer is now almost two years old and goes by Carson).  I knew right from the beginning that I would paint it white, yet I still wanted to find a way to keep the character (read: cigarette burns) in that gorgeous wood top.  I chose to paint the base with Annie Sloan’s Chalk Paint in Old White and just a quick coat of wax over the dresser top and drawer knobs definitely brought some life back to the stained wood.  I absolutely LOVE how it turned out – the cream colour sets off the beautiful wood tones just right!

Dresser Makeover @ making it in the mountains

Dresser Makeover @ making it in the mountains

Dresser Makeover @ making it in the mountains

I am really am beyond thrilled with how it turned out!!!  So thrilled in fact, that I hate to put it back into our super boring guest room, which is definitely in need of a makeover itself.  Although I am tempted to overhaul the entire room tonight, I promised Brady myself that I would focus on one room makeover at a time.  So it seems that since I’ve already committed to making a room for Carson (you can check out what we’re planning HERE), my dreams of a luxurious guest room will have to wait.  I suppose that’s really okay because, if I’m being honest, I have absolutely no clue what I want to do with it yet anyway.

Instead staying up all night redecorating our guest room, I found a few more things to paint to tide me over:

Chalk Painted Frames @ making it in the mountains

I think these empty antique frames will look lovely grouped on the wall over the dresser (just as soon as I choose a spot for it).

Dresser Makeover @ making it in the mountains

Have you taken the Chalk Painting plunge yet?

Signature1

Featured on:


Shared with: The Style Sisters, Sew Crafty Cat, Mostly Homemade Mom, Kleinworth & Co, Tiny Sidekick, Craving Some Creativity, Twigg Studios, Nifty Thrifty Things, Tatertots & Jello, Flamingo Toes, Too Much Time on my Hands, Pieced Pastimes, Be Different Act Normal, The Charm of Home, Chic on a Shoestring, Common Ground, My Romantic Home, Liz Marie Blog, The Golden Sycamore, Jennifer Rizzo, Soho Sonnet, From My Front Porch to Yours, Stephanie Lynn, The Thrifty Groove, DIY Showoff, A Stroll Through Life, I Should Be Mopping the Floor, Mod Vintage Life, Home Stories A to Z, Cupcakes and Crinoline, Cedar Hill Farmhouse, Home Coming, Upcycled TreasuresSaving 4 Six, Green Willow Pond, & Imparting Grace.


{Spring Break} Mexican Style

Hola!!!  Cómo estás?

Baby Margaritas

Spring Break has come and gone, which means the Mercers are back home from our super sunny getaway to Guayabitos, Mexico.  Now this was not a relax-by-the-pool-at-a-resort-for-8-days sort of trip …  we were lucky enough to stay with my in-laws, who have a beautiful home just steps from the ocean in the most lovely little town.  They made such fabulous tour guides showing us around the area – taking us to the yummiest restaurants, the best shops & markets and wandering with us through so many different neighborhoods.  We really enjoyed chatting with the people that call these little towns home – learning about where they live and how different life is and we really do feel SO incredibly lucky to have had the chance to experience real Mexico.  We had such an amazing time with Brady’s family and our goodbye was a hard one, but we cannot wait to go back for another visit & more adventures soon!!!


Mexico 2014
Such a FANTASTIC time with our family exploring the towns, shopping the markets, sipping margaritas (virgin margaritas for the little one of course!), playing on the beach & even planting our own coconut tree!


Here’s a peek at just a few of the treasures I found to bring home with us:

Mexico Souvenirs | making it in the mountains


And now, unfortunately, it’s back to reality … there are suitcases to be unpacked, seemingly endless piles of laundry, & who could forget spring cleaning.

I thought I’d leave y’all with a sneak peek at what I’m working on this week.  Be sure to stay tuned for some CRAZY EXCITING news to come in the next few weeks!!!

Sneek Peek Dresser | making it in the moutainsSneek Peek Gallery Wall | making it in the mountains


Adiós!
Signature1

Friday Finds: My Favorite Swoon-Worthy Posts & Tutorials this Week

This week has been SO CRAZY BUSY as we get ready to run off to Mexico! Yes, for 8 blissful days, we’ll be visiting C’s grandparents and, maybe more importantly for Carson, enjoying their swimming pool!  Anyone that knows me, knows that not only does this mean a week of stressing about packing (seriously, is there anything more daunting than having to know exactly what you’ll need for the next week?!), but also making sure my house is clean immaculate for our return … it will be SO worth it when we are exploring Guayabitos and catching up with our family.  I’d be lying if I said I wasn’t also looking forward to sleeping sipping on margaritas while watching Carson enjoy some quality time with his Grandparents!

I wish I could say that I’d planned ahead and made sure y’all would have something to enjoy while I was away, but new blog + spur of the moment trip = too much to do & not enough time plan it, let alone do it in.  Rest assured that what I have in store for you over the next few weeks is so UNBELIEVABLY exciting, there’s no doubt that it’ll be worth the wait!  I can hardly stand not blurting it all out now, but I promise you won’t want to miss what’s coming!!!

In the mean time, enjoy my favorites this week:


Favorite DIY Knockoff


Favorite Dining Room Trend


Favorite Before & After House Tour


Favorite Painted Dresser


Favorite Windows


Favorite Bathroom Makeover


Favorite DIY Plank Wall


Favorite Art Project


Favorite Recipe we tried this week


Wishing you all a fantastic weekend and week to come!!!

Signature1

Thai Steak Salad with Peanut Dressing

Looking for a simple recipe to serve your dinner guests this summer?  This is absolutely one of the best looking and yummiest recipes I know.  Adapted from a recipe I found in one of my favorite cookbooks, Whitewater Cooks with Friends (seriously, I couldn’t possibly say enough good things about this book!), this salad looks far more labor intensive than it is.  I promise it never fails to impress!!!

Thai Steak and Noodle Salad | making it in the mountains

Ingredients

marinade
1/3 cup soy sauce
1/3 cup tomato paste
4 cloves of garlic, crushed
4 tbsp ginger, peeled and minced
2 tbsp honey
1 tsp sesame oil (toasted preferred)
1 tbsp ground chili paste (Sambal Oelek)
1 – 2 lbs of your favorite steak

dressing
1/4 cup peanut butter
1/4 cup rice vinegar
1/2 cup mayonaise
1 tsp ground chili paste
1/2 tsp garlic powder
1/2 tsp onion powder
1/4 tsp ground ginger
3 tbsp hot water
2 tbsp lime juice

salad
6 cups Spring Mix greens
2 cups of stir fry noodles (cooked, coated with some olive oil & cooled)
2 carrots, julienned
1 cup sugar snap peas, halved
1 red pepped, julienned
1/3 cup unsalted peanuts, toasted

drizzle
1/4 cup rice vinegar
1/4 cup sweet chili sauce
1 tbsp hoisin sauce
1 tsp toasted sesame oil


Method

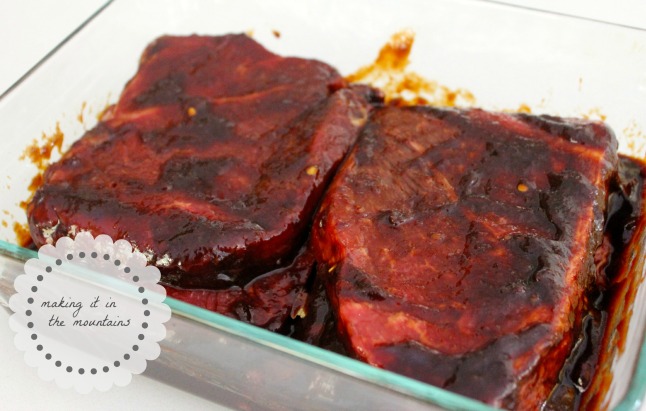
Combine all of the marinade ingredients in a glass dish, coat steak well, cover and refrigerate for at least 2 hours.

Thai Steak and Noodle Salad | making it in the mountains

Grill steak for about 5-6 minutes per side (longer if you prefer your steak medium to well done). After letting it rest for 5-10 minutes, cut the steak into strips and then into bite sized pieces.

While your steak is cooking, mix the dressing ingredients in a blender until smooth. You can also whisk together the ingredients for the drizzle. *I tend to prepare the dressing and drizzle before hand if we are preparing this for company, so that I have less to do once our guests arrive.*

To assemble the salad, toss the greens with the dressing and place some noodles on top (approximately 1/2 cup). Top with steak, carrots, sugar snap peas, red peppers and peanuts and finish with a few teaspoons of the drizzle.

Thai Steak and Noodle Salad| making it in the mountains

I haven’t tried it yet, but I think chicken would be a yummy substitute for the steak.

Enjoy

Signature1

Shared with: The Style Sisters, Mostly Homemade Mom, Tiny Sidekick, Creating Some Creativity, Twigg Studios, Nifty Thrifty Things, Tatertots and Jello, Flamingo Toes, Too Much Time on my Hands, Pieced Pastimes, Be Different Act Normal, The Charm of Home, Chic on a Shoestring, Common Ground, My Romantic Home, Liz Marie Blog, Craftberry Bush, Soho Sonnet, From My Front Porch to Yours, Saving 4 Six, Mod Vintage Life, Upcycled Treasures, Green Willow Pond, Imparting Grace, Home Stories A to Z, Cupcakes and Crinoline, Cedar Hill Farmhouse, Home Coming, I Should be Mopping the Floor, The Thrifty Groove, Stephanie Lynn, Place of my Taste, Liz Marie Blog, 36th Avenue, The Golden Sycamore, Love of Family and Home, Jennifer Rizzo, A Stroll Through Life, The Blissful Bee, & DIY Showoff.

15 Inspiring Gallery Walls that you Simply Cannot Miss!

HAPPY MONDAY!

As planned, we had a lovely and productive weekend here in the Mercer house!  We had some playtime at the park with Carson, a lovely breakfast with friends and enjoyed some walks outside taking in our gorgeous Spring weather. Even with all this fun, we were able to cross all sorts of jobs off of our to-do list and, though it was really satisfying, that part of our weekend was much too ordinary and boring to write at any length about.  So instead, I’ve found something much more fun to share:
 
15 Inspiring Gallery Walls | making it in the mountains
 
Continuing with last week’s theme of tackling projects I’ve been meaning to do for far too long, I’ve started working on a gallery wall for my living room. It had me scouring Pinterest and Houzz for inspiration and I found SO many fabulous ideas that I couldn’t help but share!  If you’re  designing a gallery wall in your home, hopefully this post will help you to get started and if you’re not, these pictures are sure to inspire you to change your mind!


I’ve shared this one before, but I’m seriously in LOVE how eclectic and comfortable it looks!


Isn’t this a brilliant idea to fill a long, empty wall?  I love how simple it is and how easy it would be to switch out the pictures and art.


This one couldn’t possibly be any more interesting or unique.


I love how nothing matches in this one, but it still somehow looks so put together.


The layers and different spacing in this one are really interesting and the wall colour absolutely makes it all pop.


I pinned this gallery wall long ago.  It is so simple, but the black and white give it a ton of dimension and impact.


 This gallery wall drew me in with it’s eclectic mixing of pieces and the bold blue wall colour.


Seriously, there’s no way I could pass this rustic gallery wall by!  With the skis and snow shoes, this would look perfect in our basement!!!


Love the clean lines in this one, especially when paired with that beautiful, rustic bench.


 Another one of my absolute faves!  I just can’t get enough of the mixed metals!  The black and white photography and the classicly styled frames help give this nontraditional layout, a very classic look.


Very simple, yet the contrast has such an impact!!!


This one is so random and the large spaces between pictures goes against everything I read, but keeping with the colour scheme makes this all work.


Young House Love did a fabulous job “wallpapering” their halls with this gallery wall!


A gallery wall without pictures … LOVE it!


Loving this eclectic mix of metals, art, photos and other interesting pieces!  You definitely need to check out the other photos at Abode Love!


As I mentioned on Friday, thanks to these inspirational ideas and my online shopping addiction, my gallery wall reveal will have to wait.  Instead this week, in between a day of teaching grade two, packing for our trip to Mexico (more on that another day) and of course getting the house spotless before I can get on a plane, I am hoping to work through a couple of projects that I can’t wait to share!


Wishing you all a lovely week!

Signature1

Like this post?  Like me on making it in the mountains facebook to follow along!

Friday Finds: Here are some of my favorites from this week

It’s been another week of lovely weather in Rossland, so we’ve been enjoying many walks and have had some lovely playdates at the park.

Since experimenting with chalk paint on Tuesday (read about it here), I’ve been super busy crossing a million boring tasks off my ever growing to-do list.  Though it feels good to get things done, it hasn’t been much fun and certainly hasn’t inspired me to write much.  I did start work on a gallery wall (those that follow me on making it in the mountains facebook will have seen some pictures).  I had full intentions of making Brady help me put it up that night, but as I scoured coralpinterest for some inspiration, I ended up finding more pieces to add to it … FIGURES! Anybody that knows me, knows that I can ALWAYS find a reason to shop online (maybe Brady’s suggestion of a post about NOT shopping for a month wasn’t such a bad idea!).   So, even though I’m CRAZY excited to share what I’ve come up with, it’ll have to stay spread out on our guest bed for a while (I promise to share some sneak-peeks on bluefb as things arrive!)  .

This weekend will be a busy one, working to accomplish more things that nobody wants to do, let alone read about on a blog (taxes, cleaning windows and installing screens).  I promise that I do have some fun posts in mind to get us all through it though! 😉  For now, I’ll leave you with some of my favorite things this week:


Favorite Design Series


Favorite Dresser


Favorite Living Room Makeover


Favorite DIY Boxes


Favorite Shoes


Favorite Gallery Wall


Favorite Closet Makeover


Wishing everyone such a fabulous weekend!!!

Signature1


Experimenting with Chalk Paint

Finally getting those shelves up last weekend has totally inspired me to tackle some other projects that I’ve been meaning to do for what feels like an eternity. Here’s what I was up to today…

Like so many others, I’ve fallen in love with that country-chic look of a painted piece of antique furniture. Not just any old panted piece of furniture will do though, I tend to gravitate toward furniture with the more rustic look of distressed chalk paint. I really do love the idea of transforming something old and worn out into a swoon-worthy piece that can bring some personality, colour and texture to a room.

I convinced Brady to purchase this dresser from an antique store in town for our nursery when I was pregnant. It was a beautiful piece with a ton of potential … though the drawers and pulls looked like they had seen better days, I couldn’t get enough of the rustic wood top.  Even before we took it home, I had a very clear picture of how I would transform this dresser.  Two years later our son has a new dresser and that beautiful antique has been tucked away in our guest room, buried under all sorts of random stuff (everyone has some spot in their home that just seems to collect random things, don’t they?).  It’s really is such a shame to see it so under-appreciated, especially when all I can see is the amazing potential it has to add to our home.

Bedside Table Makeover | making it in the mountains4
Although I am crazy eager to get working on this piece and find a new home for it in our master bedroom, I’m pretty new to the world of chalk paint (and all things DIY really) and I really don’t want to screw this up.  Enter another project I’ve been meaning to do since the days of shopping for the nursery: this little bedside table would be a perfect practice piece for me.  Before Carson was born, I ordered this table on Amazon for the nursery and, though I’ve always liked the vintage style details, I’ve never really liked the bright white colour (a hazard of shopping online I suppose).  Painting this will not only give me a chance to learn the chalk painting ropes, but it would be a fun way to add some colour to our very bland guest room.

Bedside Table Makeover | making it in the mountains
So, here we go …

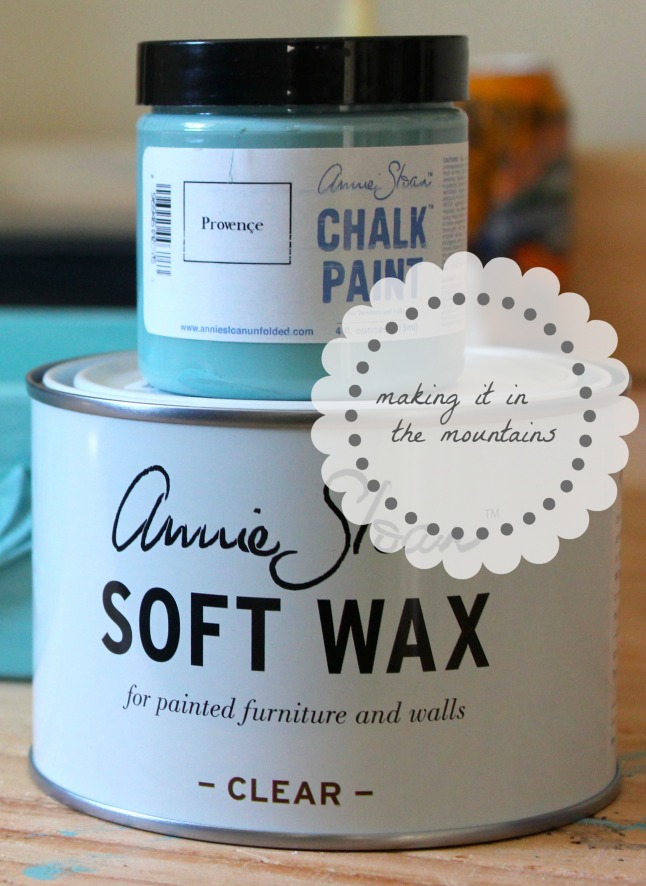
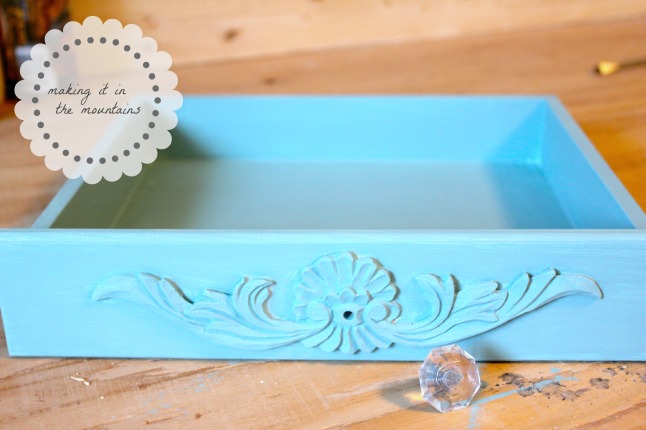
I started by removing the crystal knob and wiping down the table with a clean cloth.  Then I was ready to paint!  Seriously, because I was using chalk paint, there was absolutely no other prep involved (believe me, I triple checked!).  I chose to use this Annie Sloan Chalk Paint in Provence.

Bedside Table Makeover | making it in the mountains

The paint is thick and everything I had read said that I would likely only need one coat, but I really wasn’t happy with the brush strokes and all the white that showed through after the first coat.

Bedside Table Makeover | making it in the mountains

So, I painted a second and it looked SO much better!

Bedside Table Makeover making it in the mountains3

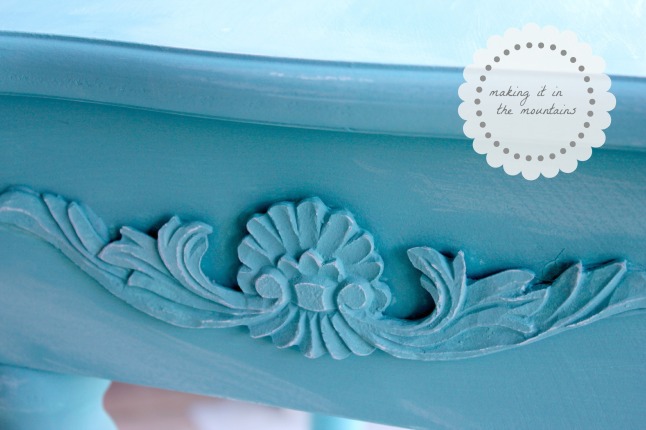
Chalk paint dries incredibly fast, but I wanted to give this second coat a couple of hours to really set before I distressed it.  Distressing chalk paint is incredibly easy – all it took was a few soft swipes with some sandpaper.  It’s important to use extra-fine sandpaper (I used 120 grit) as it doesn’t take much to dig through the paint.  If you do take a bit too much off, just go back over it with some paint – it’s really no big deal.

Bedside Table Makeover | making it in the mountains

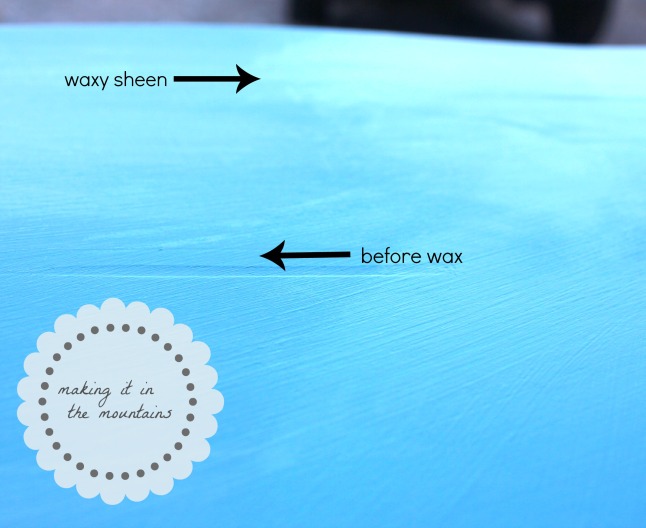
After distressing, I applied a thing coat of Annie Sloan Clear Wax.  In my research, this seemed to be the trickiest part – because it changes the colour of the paint slightly as it soaks in, it can be difficult to keep an even look.  In an effort to keep things as simple as possible, I used a rag to apply really small amounts of wax and worked hard to rub every bit of it in.  I had a tough time getting a good picture of it, but here is a shot of the top of the table as I applied the wax.

Bedside Table Makeover | making it in the mountainsAnd here it is!  Taking all of these pictures in different areas (my shop, garage & guest bedroom) ended up altering the colour portrayal a bit, but this last one was the truest.

Bedside Table Makeover | making it in the mountains

I was really surprised at how easy and almost fool-proof my first experience with chalk painting furniture was.  I honestly can’t believe it was so easy – it turned out exactly as I had hoped!  I cannot wait to transform that beautiful dresser for our master bedroom!!!

Bedside Table Makeover @ making it in the mountainsSignature1

Like this post?  Like my making it in the mountains facebook page to follow along with my journey!

Shared with: Craving Some Creativity, No Biggie, Too Much Time on my Hands, DIY Showoff, Pieced Pastimes, The Blissfull Bee, It’s Overflowing, The Happy Housie, Miss Mustard Seed, The Charm of Home, Chic on a Shoestring, My Romantic Home, The Thrifty Groove, French Country Cottage, Craftberry Bush, Liz Marie Blog, Imparting Grace, From My Front Porch to Yours, Green Willow Pond, Beyond the Aisle, Maison de Pax & A Stroll Through Life

The 36th Avenue The DIY'ers

DIY Pottery Barn Picture Ledge Shelves

Happy Monday!!!  Somehow the weekend came and went in the blink of an eye.  We had a super busy Saturday shopping in Spokane, so the only useful thing we tackled on Sunday was to get those shelves up on the wall.  I am SO excited to FINALLY share this post after so many weeks of talking about it!

DIY Pottery Barn Shelves | making it in the mountains

Since turning our wedding collage picture frame into a giant bulletin board (see picture below), I needed a new way to display some of our pictures.  I bought some barn wood frames a while ago to put the pictures into, but since I wasn’t really sure where to hang them, they’ve sat stacked in the corner of our guest room for months now just waiting to be used.  When I came across this post by Shanty-2-Chic, I knew that some picture ledge shelves would be the perfect way to display our beautiful photos and frames.

DIY Bulletin Board | making it in the mountains*My DIY Bulletin Board.

Here’s what you’ll need for each shelf to make your own:

  • 2-1x4s cut to length
  • 1-1×2 cut to length
  • some screws (I used #6 x 2″ wood screws to put together the shelves and 2″ drywall screws to attach it to the wall)
  • some finishing nails
  • wood glue

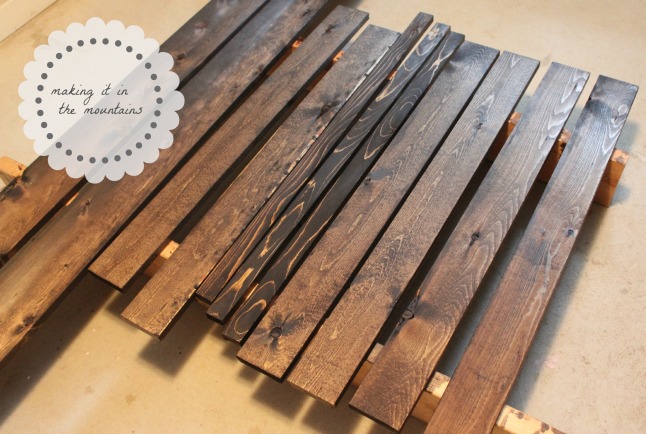
I had Brady cut our wood to 3′ lengths and then I stained each piece with Minwax wood stain in Dark Walnut.

DIY Picture Ledge Shelves | making it in the mountains*Note: The 1x6s shown in this photo were used to make this DIY Art Display Hanger.

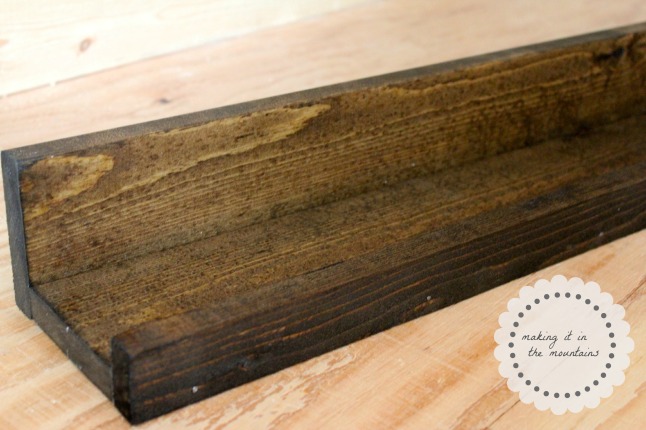
To attach our 1x4s together, I added a line of glue to bottom edge of one board and then pre-drilled through the back and screwed them together.

DIY Picture Ledge Shelves | making it in the mountainsDIY Picture Ledge Shelves | making it in the mountains

To attach the 1×2, I simply ran a line of glue along the bottom 1×4 (not the the back piece with the screws) and attached the 1×2 with some finishing nails.  That’s it … easy peasy!

DIY Picture Ledge Shelves | making it in the mountains

Although my original intention was to leave the beautiful walnut stained wood exposed, in the end, I chose to apply a coat of Annie Sloan Chalk Paint in Old White over top of the stain because (1) I didn’t like the way the colour turned out on the 1x2s and (2) I thought the white colour would contrast more with my barn wood frames.  I’ve only just begun experimenting with Chalk Paint, but I’m in love with it already!!!  It’s so easy to see why it’s become so popular … you don’t need to prepare the surface at all (though if you have raw, unfinished wood, you’ll need to shellac or stain it first), you can paint ANYTHING, it dries quickly, distresses easily and just a little paint goes such a long way.

Here’s what the shelves looked like after the first coat of chalk paint.

DIY Picture Ledge Shelves | making it in the mountains

And after the second coat.

DIY Picture Ledge Shelves | making it in the mountains

I also chose to sand it down a bit to give it more of a distressed, rustic look.  I absolutely love the way the dark stain shows through!

DIY Picture Ledge Shelves | making it in the mountains

To hang these babies on the wall, I screwed a couple of 2″ drywall screws through the shelves into the wall studs.  It didn’t really matter to me that the screws into the wall were visible because they would be covered with pictures anyway, but you could always nail some art hooks onto the back if you didn’t want them to be visible.

Shelves

Finally, it was time to pile them full of pictures!

DIY Picture Ledge Shelves | making it in the mountains

I am so in LOVE with how these turned out!!!

DIY Picture Ledge Shelves | making it in the mountains

Signature1

Like this post? Then, don’t miss a beat! Like my making it in the mountains facebook to follow along with my journey!

Shared with: Sew Crafty Cat, Kleinworth & Co, Craving Some Creativity, Saving 4 Six, No Biggie, Too Much Time on my Hands, DIY Showoff, Pieced Pastimes, The Blissful Bee, It’s Overflowing, Miss Mustard Seed, The Charm of Home, Chic on a Shoestring, My Romantic Home, The Thrifty Groove, French Country Cottage, Craftberry Bush, Liz Marie Blog, Imparting Grace, From My Front Porch to Yours, Green Willow Pond, Maison de Pax, A Stroll Through Life, I Should be Mopping the Floor, Mod Vintage Life and Elizabeth Joan Designs.

The 36th Avenue The DIY'ers